 |
By: Pat Lefemine - Founder, Bowsite.com and DeerBuilder.com |
To a food plot grower, moisture is our friend. We plant our crops and then follow our weather app hoping for that first raindrop to kick start our new crop. We are overjoyed as the rains hydrate the soil and those first beautiful green sprouts start to appear.
There are times, however, when hydration is not the problem. Saturation is. And this can be worse than drought. It renders entire fields untillable. It can drown and wash away all the efforts you put into soil prep, fertilizing and planting. In some cases, it forces you to scratch a prime plot location off the list.
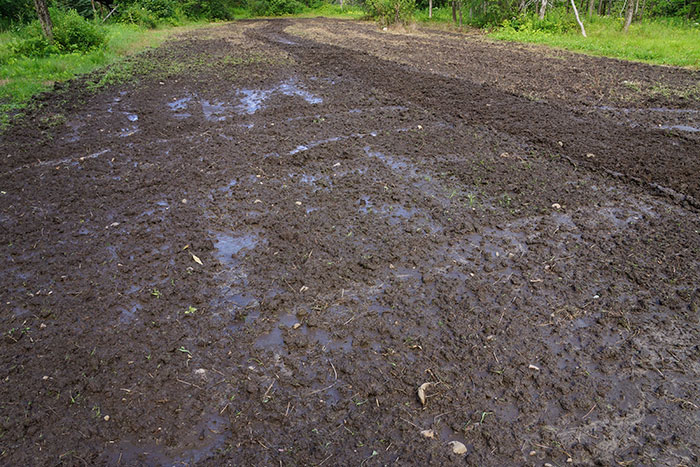
Here is our field prior to draining. It is perpetually wet and untillable. The location is perfect so draining is our only hope
Luckily, there is a solution and it’s a one-time fix. It’s also a relatively cheap and simple, one-day DIY project. It’s called drain tiling and it’s been utilized in farming for a hundred years.
What is Drain Tiling?
Drain tiling is the process of directing and moving water from one area to another. In its most common form drain tiling is closer than you think, your basement and foundation likely employs drain tile to move water away from your home to a sewer drain or some other location.
In food plots and farming it’s the same concept, only the runs are much longer. Some farm drain tiles run thousands of feet long. For food plots, that’s rarely necessary and runs under a hundred yards are common.
Equipment
Drain tiling a field requires some basic excavation. You need to dig a trench. Not a particularly wide trench, just one big enough to lay 4-6” drain pipe roughly 3-4’ deep and optionally with enough width to shroud the pipe in gravel.
 |
 |
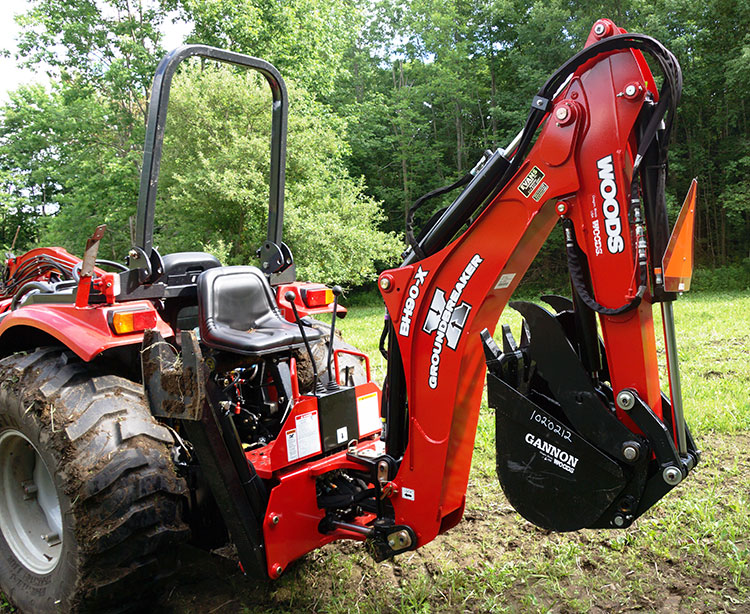
There are a number of trenching techniques ranging from horrible to awesome. The awesome option is if you own, borrow, or rent a tractor with a backhoe. I own a Woods Equipment BH-90X backhoe which is perfect for this application. The Woods backhoe allows me to swap out buckets. For this job I disconnected my 36” bucket and attached my narrow, 12” bucket - perfect for digging a drain tile trench. If you are shopping for a backhoe, I would suggest you consider the hydraulic thumb option. When you hit your first hundred pound boulder you will be immediately happy you spent the extra money. We hit 15-20 boulders during trenching. I simply picked them up and moved them out of the trench.
Another option is to rent a trenching machine like a Ditch-Witch or similar unit. The issue with these units is they will stop dead in their tracks if you hit a boulder. When that happens you are forced to start a new trench. That is a real pain.
Finally, the most difficult, albeit cheapest option is to simply dig the trench by hand. That was not an option for our project given the length of trench, abundance of boulders, and soil composition in our field. But if your soil is perfect, you crave exercise, and you possess an abundance of free time this is a viable option.
An option (I like) which makes the drain tile more effective is to shroud the pipe in crushed stone. The stone acts as a filter for the pipe, speeds up water flow, and helps direct water to the pipe. This is not a requirement. Lots of farmers install drain tile directly into the soil. If you decide to go this route you’ll need a trailer to get the stone to it. My dump trailer and Woods Equipment loader is invaluable for this task.
Materials
You are going to need to purchase drain tile. You can find this at some home centers, tractor supply, and local construction and lumber retailers. One note, plastic drain tile comes wrapped in fabric and it also comes as bare plastic pipe. The fabric is meant to prevent debris from clogging the pipe. There are pros and cons to both but I opted for no fabric.

We used 4" perforated drain pipe with no fabric covering for this project
If you are going to shroud the tile in gravel you will need to have a load dropped off. The amount of gravel depends on the width and length of the trench. For my 100 yard trench I used about a ton of gravel.
Designing for Drainage
Laying out your trench is the first step, identifying where the water will go is the most important step. You don’t want to drain one wet area and create another. If there is a stream or swamp nearby that is where you want the water to go. But if there is no water source you will need to direct the water into a ditch. If it doesn’t exist you will need to create the ditch. The ditch doesn’t need to be much more than depression to direct the water away from your food plot.
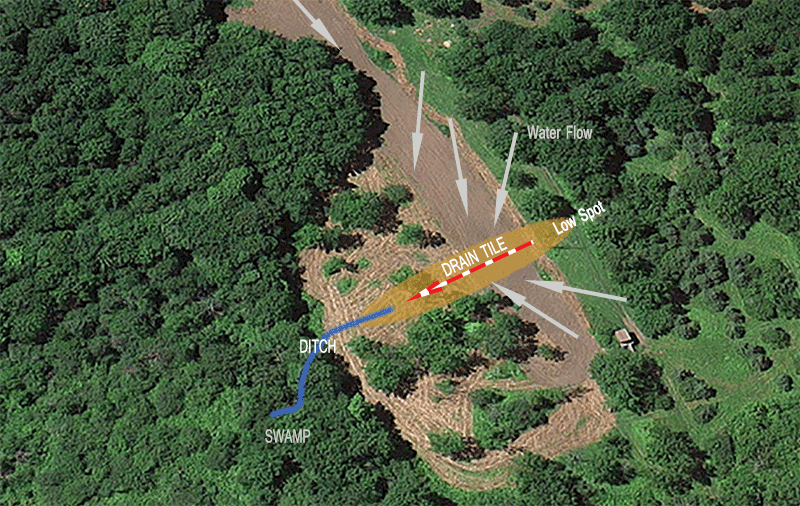
This Sat Photo shows our field, water flow and layout of our tile project
Once you’ve identified where your water goes you can map out the trench along the lower terrain of the field. You can do this in a variety of ways, we used marking flags that you stick into the ground.
Now that you have your problem area identified, have flagged your trench and identified where you want the water to go, and have secured the equipment and materials it is time to get to work.
Step by Step
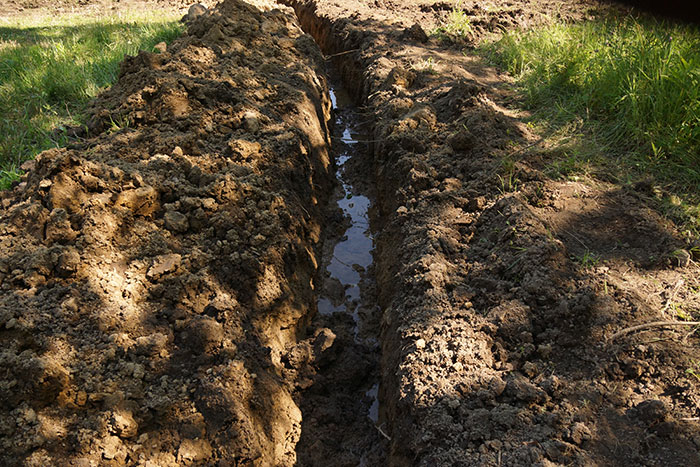 |
Step 1 – Dig your trench and your outflow ditch. It doesn’t need to be very deep – 3 to 4 feet is sufficient. While digging be careful that your trench walls don’t collapse. If they do, you will need to excavate them again and will end up with a wider trench. If you are dealing with wet soil your trench may begin filling up with water. To prevent that, start your ditch from the downhill side and work uphill. Make sure you direct the water away from your trench and into your ditch. |
 |
Step 2 – Lay down gravel base layer (optional) – before you lay down your pipe it helps to have a 2-3” layer of gravel under the pipe. This helps to keep the pipe from sinking into the muddy trench and aids with water flow. |
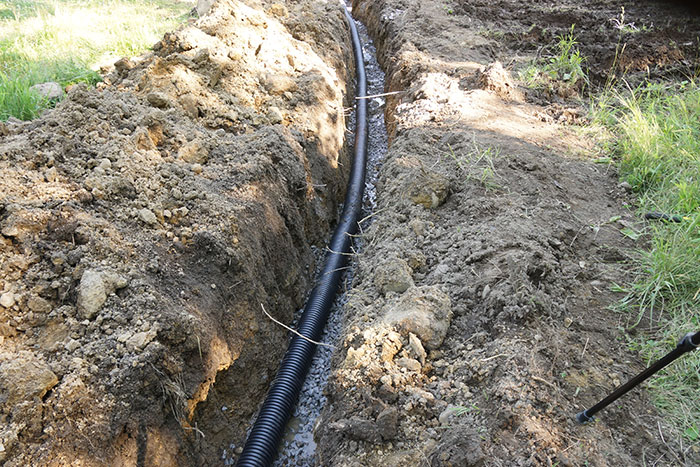 |
Step 3 – Place your drain pipe – if your trench is wider than your pipe as mine was, you can center your pipe in the trench by using alternating stones on either side of the pipe. If you are joining other pipes to this run such as a perpendicular pipe then now is the time to install your T-connectors or Y-connectors. I like to cap the uphill end of the pipe to keep it free from debris. |
 |
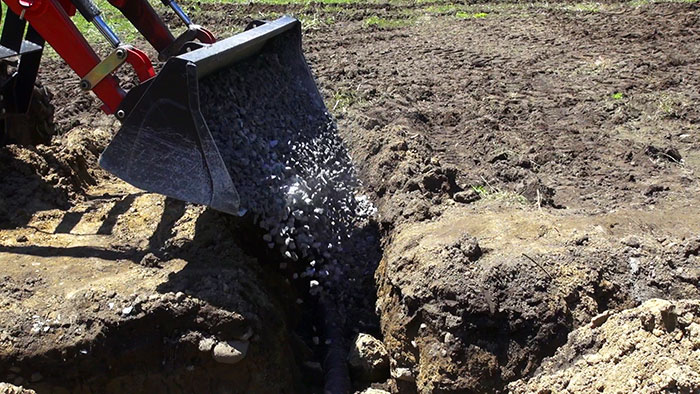
Step 4 – Cover the pipe with gravel (optional) – covering the pipe with gravel promotes water flow to the pipe while keeping solids and mud from clogging the pipe. You don’t have to use gravel, but it definitely assists in draining the soil so we opted to use gravel on our project. |
 |
Step 5 – Backfill your trench – If you can get your hands on a bulldozer this job will be a snap. Since most food plot guys don’t have a dozer you can just as easily use the loader on your tractor. |
Results
A month after we installed our drain tile the water was flowing beautifully and our field dried to the point where we were able to till and plant it.
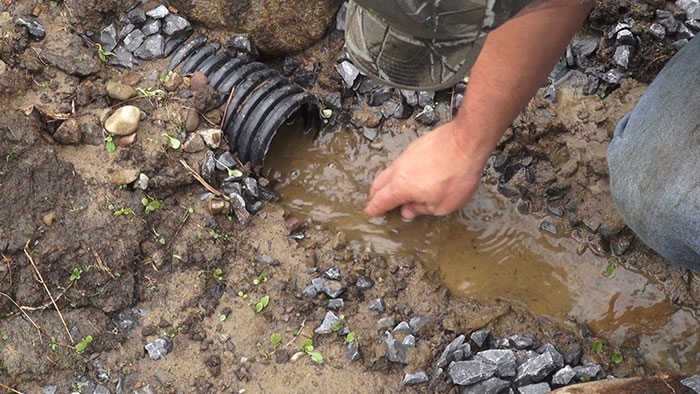
Photo taken one week after project was complete. Water is flowing through the soil and directed to our pipe where it is moved to our drainage ditch.
Our job took us about six hours to install a 100 yard drain tile and outflow trench. Now we have a useable, well drained 1 acre food plot that can be tilled, fertilized and planted in whatever we want. For about $400 I was able to secure the best location on my property for my next food plot project. It was time and money well spent and the best part was that it was very easy!

Here is our field one month after tiling and with a healthy crop of brassicas coming up. Our tiling job has worked well and a formerly wet field is now growing a food plot.