How to Protect your Food Plots with an Electric Fence
By Pat Lefemine
In 2010 I planted a combination forage soybean and pea plot on ground we purchased in upstate NY. We did everything right, took a soil test, broke the ground, and amended the soil with lime and fertilizer. The seed mix came up great and the deer loved it. Actually, they loved it too well and killed the plot before it got established.
So the following year I knew I wanted to try these crops again, this time using a system to protect the plot during the establishment phase. I looked at all options but eventually landed on an electric fence that surrounds the plot.
My objectives were simple:
- Had to keep the deer out
- Had to be removable, and re-installable
- Had to be Solar since no power is available
- Had to be cost effective.
Step 1 – choose the fencing configuration
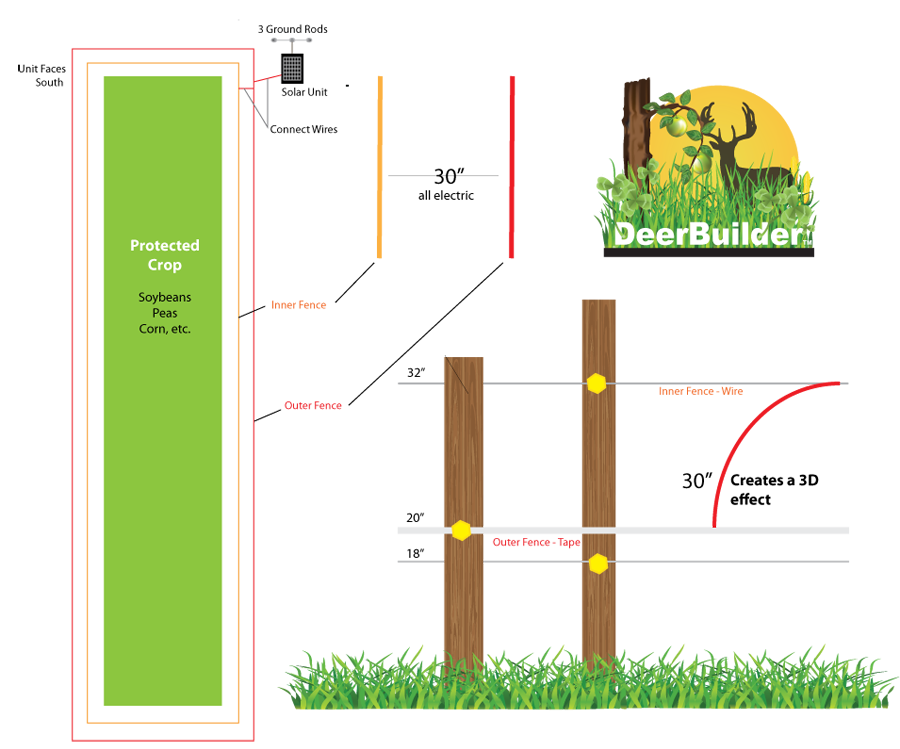
There are a number of fencing configurations available. The one I like and decided to use is a 2-fence configuration that creates a double layer of fence spaced 30” apart. This presents the deer with a psychological 3D barrier that makes them hesistant to jump. The outside fence consists of a single strand of poly-tape 20” high, and the inside fence has 2 wires set at 16” and 36” tall.
Step 2 - Planning
Once we knew what our fence configuration looked like, the planning stage was simple. I took a sharpie, a piece of paper, and some temporary fiberglass poles to mark out the corners. I ran a Rolo-tape ground distance measurer writing down each length. I then took that length (just under 1000’) and figured out how many T-posts I needed, step in posts, polytape, smooth wire, clips and how big of a unit I needed to electrify the fence.
Step 3 – Installing T-Post, Polytape, and Wire
Once we had our plan and all the materials, we took our fence components out to the plot with our tractor and used the loader to press the fence posts into the soil per our plan. After adding the insulated plastic clips to the T-posts we ran our polytape on the outside fence, then ran smooth wire along our inside fence.
Step 4 – Installing step-in Posts
With the wire and T-posts up, we then walked the fence pacing off every 10 yards and installing 2 step-in posts at each interval. This gives the fence the structure and spacing it requires to keep the fence stable. This step took very little time and was remarkably stable.
Step 5 – Installing the Solar Unit/Charger
We decided where to place our solar unit. It was in a south-facing location that gets great sunlight most of the day. We mounted the unit to a tree temporarily until we can install a standalone Post in the next couple of weeks. We also pushed 2 ground rods into the soil. The unit has two connections, one connection attaches to the ground rods. The other connection attaches to the electric fencing wire. We tested the outside polytape fence first. Once that checked out we attached a jumper to the two wires on the inside fence. The entire fence was electrified.
Step 6 Final – Cleaning/Inspecting
If trees or brush rub up against the hot wires. Or the wires come in contact with a metal fence pole the voltage will drop dramatically. It’s important to walk the entire length of the fence ensuring there is no brush or obstructions making contact with the wires. If so, fix this immediately.
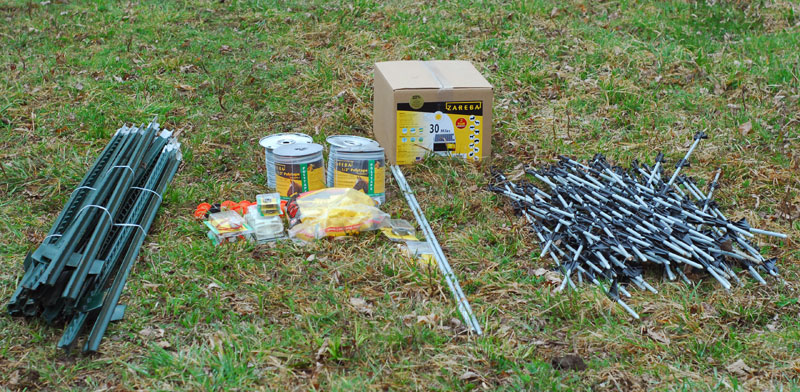
Our ½ Acre Plot Materials List:
|
Qty |
Price |
Description |
|
1 |
300.00 |
30 mile, .5 Joules Solar Fence Energizer |
|
15 |
95.00 |
T-Posts (7’) |
|
2 |
30.00 |
Grounding Rods |
|
1 |
30.00 |
½ mile Galvanized Fencing Wire |
|
2 |
65.00 |
½ inch Polytape 400m spools |
|
56 |
110.00 |
Step in 48” Fiberglass Poles |
|
NA |
20.00 |
Assorted accessories like tape splicers, insulated handles, ground rod clamp, wire splicers, etc. |
|
Total |
650.00 |
*Note – this unit could power a much larger fence. By adding a few more posts you could charge up to 5 acres with this configuration easily. |
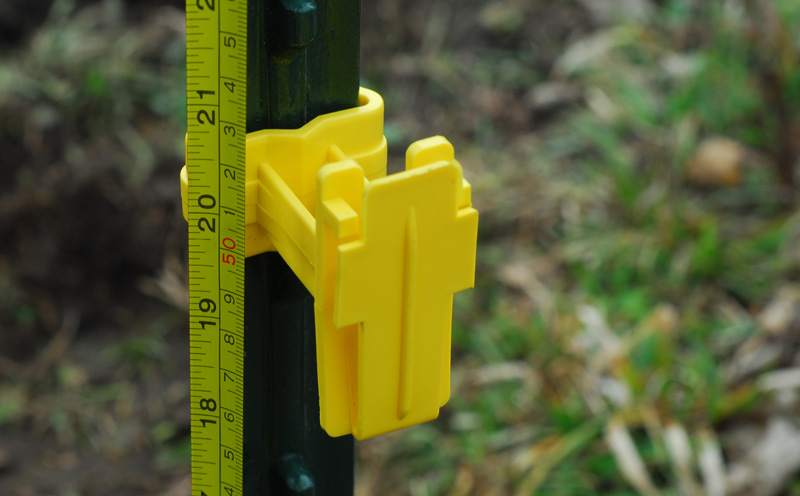 |
| Every Post was measured so we kept a consistent height across all three wires. |
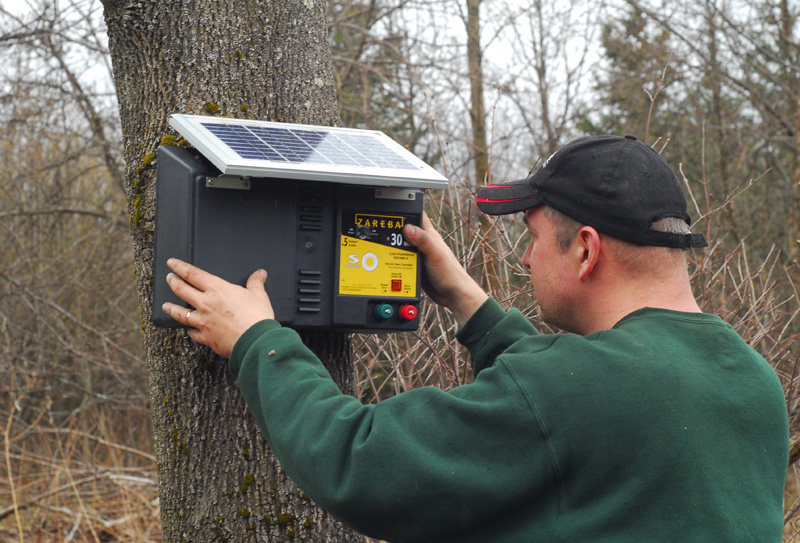 |
| I temporarily hung the main solar unit on a tree. In the next couple of weeks we'll dig a post hole and mount the unit to that. |
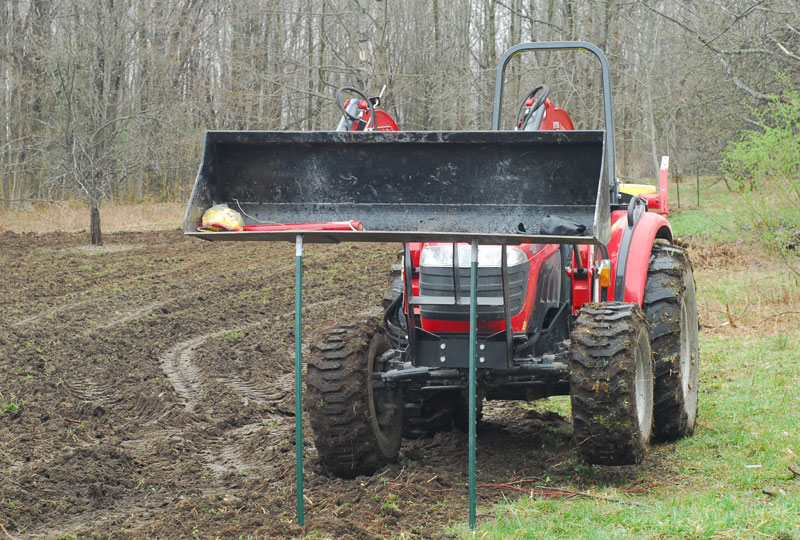 |
| My McCormick X10.55 made sinking the T-post a simple (and Fun) job. Sure beat the hell out of using a sledge hammer! |
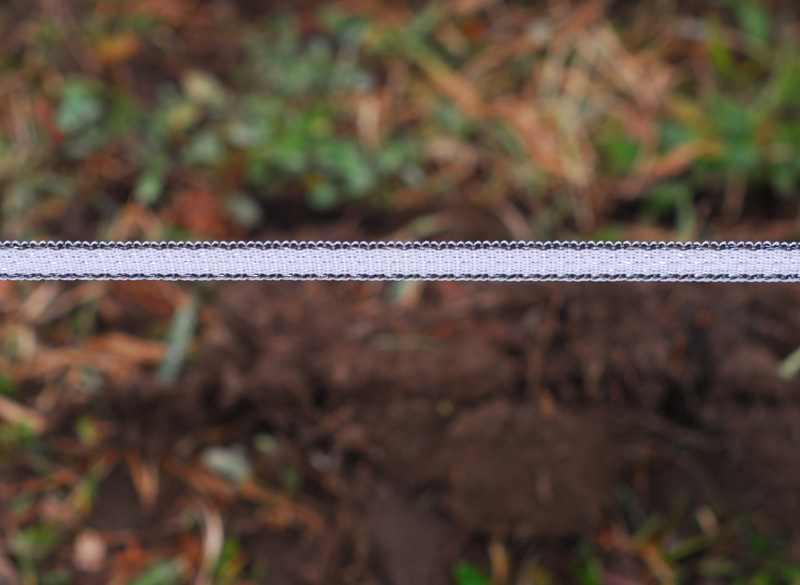 |
| The outside hot wire wasn't a wire at all. We used Polytape which is a plastic tape embedded with higly conductive wire. The tape is far more visible to the deer than a wire and it helps prevent the deer from crashing into your fence. |
 |
| An inegral part of any electric fence is the grounding system. The directions called for 3 rods but we use 2 and they worked just fine. We sunk the grounding rods in 5 feet into the ground. |
 |
| My son Matt put most of the fencing up and it came out great. |
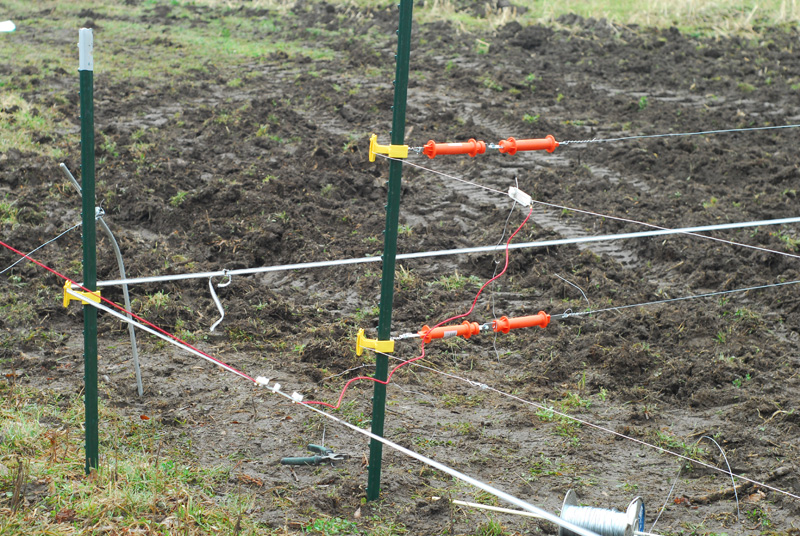 |
| The back corner where we hooked up the Charger. |
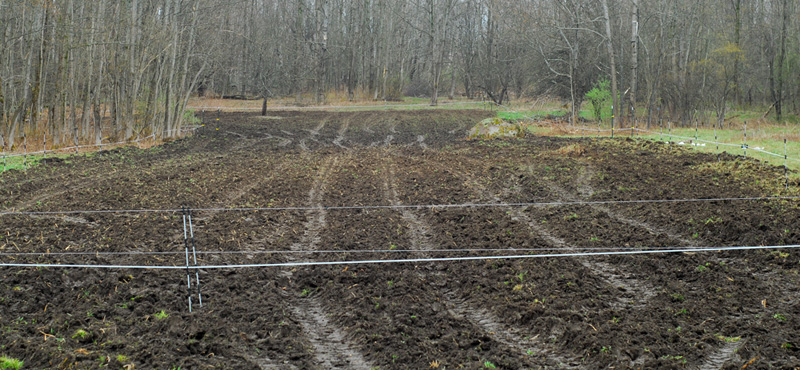 |
| Our completed fence project. It was very easy to do and took about 2 hours to install. |